Editing Photos With AI Studio
Edit real estate photos with AI Studio in Spatiko: virtual twilight, staging, sky replacement and more, what each edit costs in credits, and how review works.
Last updated
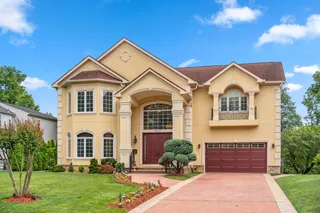
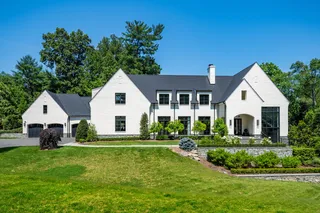
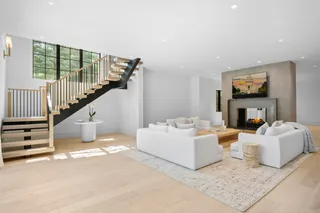
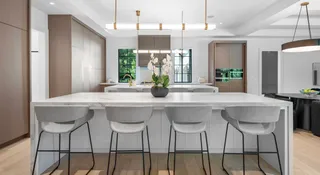
AI Studio edits the photos already on an order — turn a daytime exterior into a twilight shot, stage an empty living room, swap a grey sky, green up a patchy lawn. You pick the photos and the edits, Spatiko renders them in the background, and you review every result before anything reaches the client.
It sits alongside your human editors, not instead of them: use AI Studio for quick add-ons you’d otherwise send out, and send media for editing when a shoot needs a retoucher’s hand.
What AI Studio can do
The edit picker lists these, most-used first:
| Edit | What it does |
|---|---|
| Virtual staging | Furnish an empty room — nine styles, lightly or fully furnished |
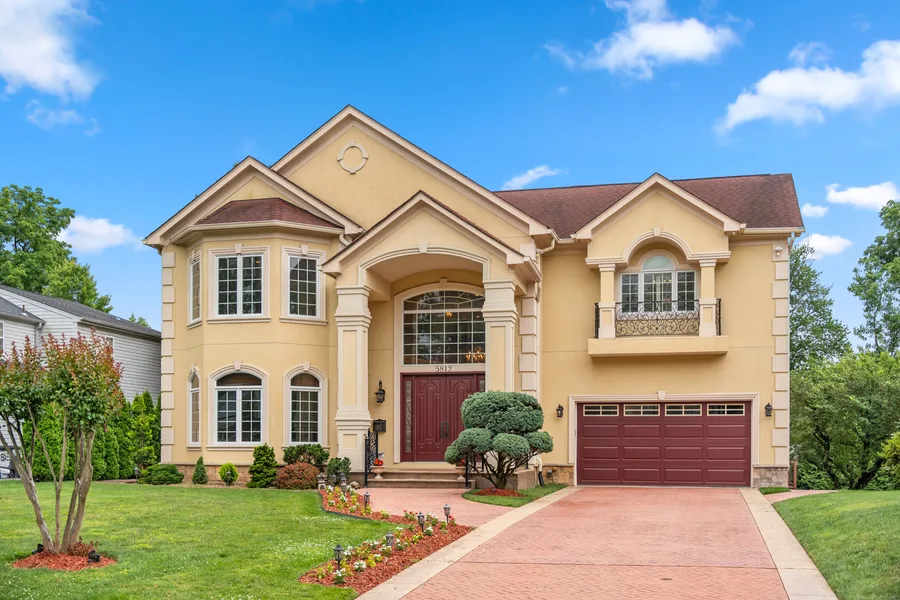
| Virtual twilight | Dusk sky with warm, glowing windows — golden hour, blue hour, or after dark |
| Declutter | Tidy an occupied room — a light tidy or thorough |
| Remove objects | Describe what should go, such as a car in the driveway or the bins |
| Green lawn | Revive patchy or browned grass |
| TV screen | Fill the black rectangle with neutral artwork, a scenic photograph, or an off screen with the room’s reflection |
| Sky replacement | Swap a grey sky for a clear blue one |
| Lights & fireplace | Lamps on, fire lit |
| Window pull | Recover the blown-out view |
| Enhance | Balance exposure, color, and clarity |
| Pool water | Clean, natural pool colour |
| Virtual renovation | Swap floors, cabinets, countertops, or wall paint |
| Season swap | Turn a winter shot into summer, spring, or autumn |
Anything that isn’t on the list, you can describe in your own words instead.
Before you start
- Plan: AI Studio is on Starter and up. On the Free plan, the Editing tab shows an upgrade card in its place.
- Credits: every render spends AI credits. Some plans include a monthly allowance; Starter doesn’t, so Starter studios buy a one-time credit pack. See pricing for what your plan includes.
- Permission: you need permission to manage the order’s media, and the order can’t be cancelled.
- Photos only: AI Studio works on the order’s photos once they’ve finished processing and show as ready — not floor plans, and not video. It edits what’s on the order’s Media tab, so upload your photos first.
Opening AI Studio
There are four ways in, and they all open the same studio:
- Media tab toolbar — AI Studio opens the studio with the photos you’ve selected. With nothing selected, it opens on the order’s first photo and you tick the rest inside the studio. On a phone it’s in the Photos section’s Actions menu.
- One photo — hover a photo and click the sparkle button, or right-click it and choose AI Edit, to open the studio on just that photo.
- Lightbox — while you’re viewing a photo full size, the sparkle button (AI Edit) in the top bar opens the studio on that photo.
- Editing tab — the AI editing card offers New AI edit, and once work is under way it shows what’s rendering and ready, with Review results one click away.
Inside the studio
The studio opens full screen in three parts:
- Photos on the left. Tick the photos you want in this edit — the lit thumbnails are exactly what you’ll be charged for. Select all, Group by room, and Search photos help on a big shoot, and the counter reads, for example, “3 photos in this edit · 24 in the shoot”.
- The canvas in the middle shows the photo you’re looking at. If you’re previewing a photo that isn’t in the edit, a strip offers Add to edit or Edit only this.
- The inspector on the right is where you choose the edits and the output, see the price, and hit Generate.
Your credit balance sits in the header; click it to top up. On a phone the three parts become tabs — Photos, Canvas, and Edits.

Picking your edits
Under What to change, click Add edits and tick as many as the photos need. Everything you pick runs in one pass on every selected photo, so twilight plus a green lawn is still one render per photo. One pass takes up to 6 edits, and results are usually cleaner at 4 or fewer — the studio warns you past that.
Some edits need a word from you: Remove objects asks what to remove.
Advanced settings
With Advanced off, every edit uses recommended settings, and the card shows them in a single line — “Golden hour · Clean gradient · Subtle” for Virtual twilight, for example. Switch Advanced on to tune each edit’s options (time of day, sky, and window glow for twilight; style and amount for staging; surface and finish for renovation) and to choose the output Shape.
Notes and describing it yourself
The box under the edits is Notes for every edit — anything specific, like “keep the porch light off”. It applies to every selected photo.
With no edits picked, the same box becomes Or describe it yourself, and your words are the whole instruction: “clear blue sky, green up the lawn, and take the bins off the driveway”. Give it a sentence rather than a word or two — the studio asks for a few more words if the description is too short. Notes run up to 2,000 characters.
References
Add reference lets you attach up to three example images (JPEG, PNG, or WebP) and tag each one as a Style, Sky, Furniture, or Object reference. A reference keeps results consistent across a shoot — the same sky on every exterior, or the same furniture style in every staged room.
Choosing the output
The Output card holds the settings that apply to the whole run:
- Engine — Sage gives crisp, true-to-life colour and detail; Amber gives warmer, more atmospheric light. Same edits, same credits — if a result isn’t quite right, try it with the other engine.
- Size — 2K is sized for MLS and the web, the size most listings publish. 4K renders at twice that resolution, for print, large crops, or hero shots, and costs more per photo.
- Shape (Advanced only) — Auto keeps each photo in its own shape. Pick a shape such as 9:16 Reel / Story or 1:1 Square and every photo in the run that isn’t already that shape is recomposed to fit, which may crop the edges or extend the scene. That’s how you get a vertical reel frame from a landscape photo.
- Variants — up to four different takes of the same edit, generated side by side so you can pick the best one. Each take is charged.
What it costs
AI edits are priced per photo, per take:
| Size | Credits per photo, per take |
|---|---|
| 2K | 25 |
| 4K | 50 |
The price doesn’t change with the number of edits you stack or the engine you choose. Three exterior photos with Virtual twilight at 2K cost 75 credits; ask for two variants of each and it’s 150.
Before you generate, the inspector shows the quote — for example, “3 renders · 2K” at 75 credits, and your “Balance after” — and the button reads Generate 3 images with the total on it. If your balance can’t cover the run, the button becomes Buy credits instead.
If your credits run out partway through a big run, the photos that already started keep rendering and the rest don’t start: “Credits ran out partway — the remaining photos didn’t start.” Top up and run those photos again. Every render shows in your credit history as an “AI edit” entry — see AI credits.
How long it takes
Renders run in the background, so you can close the studio and keep working. Most edits finish in under two minutes. When things are busy, a render can wait in the queue for up to about 15 minutes before it starts. Any render that passes 25 minutes is stopped and its credits are returned automatically.
A small AI Edits panel in the corner of the app tracks renders across all your orders and links straight to each order’s results. From there you can stop renders that haven’t started yet — they’re cancelled and refunded, while renders already in progress finish and land in review.
A couple of limits keep the queue healthy:
- An order can hold up to 64 open results — queued, rendering, or waiting for review. Review them before starting more.
- Your studio has a daily render capacity. If a run needs more than what’s left today, the studio says how many remain — capacity resets overnight, or you can try the other engine.
Reviewing results
Finished renders wait in AI results — open it from the AI results button on the Media tab, Review results on the Editing tab, or the AI Edits panel. Nothing is added to the order until you review and save.
- Filter by To review, Kept, Failed, or All. Results are grouped by run, and Keep all keeps a take of every photo in the run you haven’t kept yet, in one click.
- Compare puts a before/after slider over the photo, and Hold for original flashes the untouched version while you hold it.
- Keep or Discard each result. With several variants, keep as many as you like — the rest are discarded when you save.
- Try again renders a fresh take of the same edit on that photo, and shows its price on the button. The current take stays until you decide on it.
- Keyboard shortcuts: ←/→ move between photos, K keeps, X discards, C toggles compare, B holds for the original, and ⌘Z undoes the last decision.
When you’re done, click Save changes. If you close without saving, Spatiko asks whether to save your decisions — nothing reaches the order, and nothing is discarded, until you do.
What happens when you save
Each result you kept is added to the order as a new photo. The original is never replaced, hidden, or moved, and it keeps its hero status — so both versions are delivered, and you can remove either one from the Media tab if you only want to send one. Kept edits go out with the delivery like any other photo on the order, and they appear in the order’s Editing history with what was kept and what it cost.
On an order backed by Dropbox, each kept edit is also saved to the order’s delivery folder in your Dropbox. If that copy can’t be saved, the photo is still delivered — the AI Edits panel flags it as not archived.
Refunds and re-runs
- Failed renders are refunded automatically. The result shows under Failed with the reason and “Credits returned to your balance”. Try again starts a new render at the price shown on the button, or Dismiss clears it.
- Stopping queued renders refunds them. Renders that were already in progress finish and land in review.
- Discarding a finished result doesn’t refund it — the render happened, whether or not you keep it.
- Running the same edit again is charged again. If you click Generate twice on the same setup, the studio asks you to confirm: “it will be charged again.”
Review before you deliver
Under the Generate button the studio reminds you: “AI can make mistakes. Review results before delivering.” Check each result at full size — edges, reflections, and fine details like window frames and railings are where AI edits most often slip.
Results aren’t labelled as AI-edited in the delivery, so the disclosure is up to you and your client. Many listing services and local rules expect virtually staged or digitally altered photos to be disclosed, and some ask for the unedited version alongside. Check the rules where your clients list, and keep the original on the order — AI Studio leaves it there by default.
If you change plans
AI Studio needs a Starter plan or higher to start new edits. If you downgrade, you can’t start new runs. Renders already under way still finish, the AI Edits panel keeps tracking them (and can still stop the ones that haven’t started), and past runs stay in the order’s Editing history.
Go deeper
- AI credits — how your balance is made up, which credits spend first, and how to buy a top-up pack.
- Sending media for editing — hand a shoot to a teammate or outside editor when it needs a human retoucher.
- Uploading and processing media — get photos onto the order so AI Studio has something to work from.
- Choosing which photos appear on a property website — decide whether the original or the edit leads the listing page.
- Sending a delivery — send the kept edits to your client with the rest of the shoot.
Frequently asked questions
How many credits does an AI photo edit cost?
Each photo costs 25 credits per take at 2K and 50 at 4K, however many edits you stack on it in one pass. Extra variants are charged as extra takes, so three variants of one photo at 2K cost 75 credits. Failed renders are refunded automatically, and because AI can make mistakes, review every result before you deliver.
Does an AI edit replace my original photo?
No. When you keep a result and save your decisions, it's added to the order as a new photo, and the original stays exactly where it was — both go out with the delivery. Nothing reaches the order until you save in AI results.
Do I get my credits back if I discard an AI result?
No. Discarding a finished result doesn't refund it, and running the same edit again is charged again. Credits come back automatically for renders that fail and for queued renders you stop before they start.
Which Spatiko plans include AI photo editing?
AI Studio is included on Starter and up and runs on AI credits. Starter has no monthly credit allowance, so Starter studios buy one-time credit packs to use it. If you downgrade, you can't start new edits, but renders already under way still finish and past runs stay in the order's editing history.